
Introduction
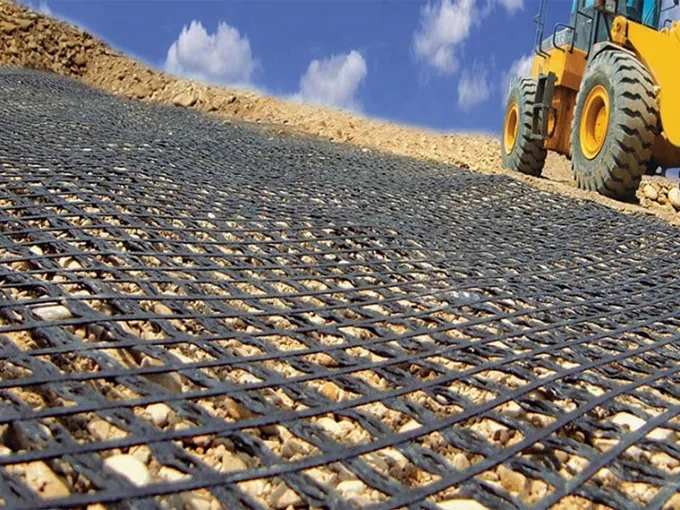
Geogrids, with their unique grid structure, interact with soil to effectively disperse soil pressure and enhance stability. In complex geological conditions such as soft soil foundations and fill slopes, geogrids act like a robust skeletal structure, significantly improving the retaining wall's ability to resist lateral soil pressure and prevent soil displacement.
Preparation Before Installation
1. Material Preparation
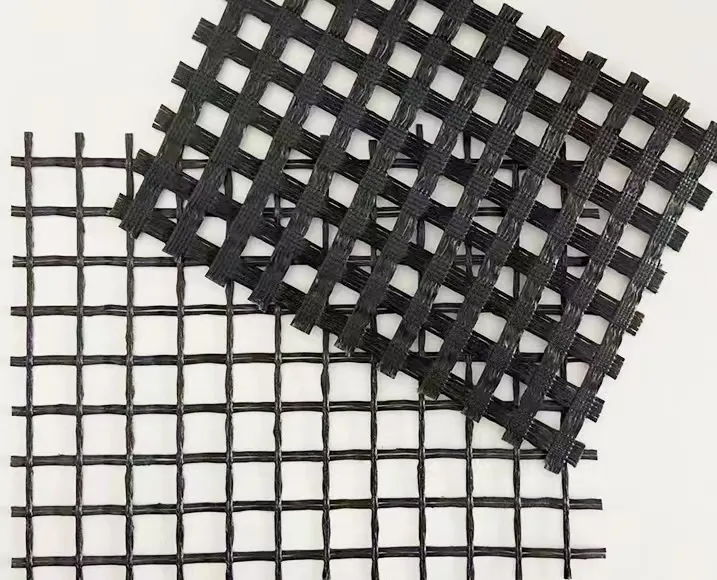
Choosing the right geogrid is crucial and should be based on the retaining wall's design requirements and actual working conditions. When considering strength, select a geogrid with tensile strength suitable for the lateral soil pressure the wall will encounter. For high-fill retaining walls subject to significant lateral pressure, high-strength, low-extension biaxial geogrids are often preferred due to their excellent tensile properties. The size of the grid openings is also important; smaller openings enhance interlocking with fine-grained soils, while larger openings can be used in coarser soils to ensure effective embedding and reduce material costs. Additionally, prepare sufficient connectors and fasteners, such as U-shaped nails and connecting rods, that are corrosion-resistant and high-strength to ensure a tight connection between the geogrids and the soil. Strictly control the quality of all incoming materials, checking for product certificates and testing reports to prevent inferior materials from entering the project.
2. Tool Preparation
A complete and high-quality toolset is essential for the successful installation of geogrids. Cutting tools like sharp geogrid knives or electric saws ensure precise cuts and clean edges. Measurement instruments including levels, theodolites, and tape measures are necessary for accurately determining the wall's position and slope. Compaction equipment such as small plate compactors and jumping jack compactors are vital for ensuring a dense and uniform soil environment, enhancing the geogrid's performance. Regular maintenance and calibration of tools are necessary to ensure smooth operation throughout the installation process.
3. Site Preparation
The condition of the construction site directly affects the quality and progress of geogrid installation. Begin by clearing the site of all surface debris, including weeds, stones, and construction waste, to prevent damage to the geogrid. For poor geological conditions, use pre-treatment methods like filling or reinforcing to establish a solid foundation for subsequent filling and geogrid installation. The drainage slope of the site should be designed to ensure rainwater quickly drains away, maintaining a dry and stable working condition.

Detailed Installation Steps
1. Foundation Treatment
Foundation treatment is critical for the stability and durability of the retaining wall. Determine the excavation depth and width based on the wall design height, geological reports, and soil mechanics parameters. Generally, the foundation depth should be at least 0.5 meters below the frost layer and no less than 1/10 of the wall height. Control the excavation slope to prevent collapses, using support measures where necessary. After excavation, compact the base using rollers and compactors until the compaction reaches over 95%.
2. Geogrid Installation
The installation of the geogrid is the core procedure and must be done meticulously. Lay the geogrid with its primary load-bearing direction perpendicular to the wall face to maximize tensile performance. Ensure continuous and seamless installation, with adjacent geogrids tightly connected. Use simple tensioning tools to keep the geogrid taut and free from wrinkles. Overlaps should meet design specifications, typically at least 30 cm for plastic geogrids and 20 cm for fiberglass geogrids, secured with U-shaped nails and nylon ropes.
3. Filling and Compaction
After the geogrid is laid, fill with suitable materials such as gravel or coarse sand, avoiding clay and silt to prevent water accumulation and reduction of strength. Fill in layers of 20-30 cm, adjusting based on compaction equipment. Start filling from the wall back and avoid direct dumping. Use a combination of static and vibratory compaction methods to achieve the required density, typically not lower than 96%.
4. Wall Panel Installation
The final step is installing the wall panels, usually made of precast concrete. Ensure the panels are installed with precision and secured to form a continuous wall, maintaining alignment and flatness.
Installation Considerations
1. Safety Measures
Safety is paramount on the construction site. Workers must wear safety helmets, use safety harnesses when working at heights, and wear protective footwear. Ensure all machinery is operated according to safety protocols.
2. Quality Control
Quality control should be maintained throughout the installation process. Conduct rigorous inspections of materials and workmanship at each stage to ensure compliance with standards.
3. Environmental Protection
Implement measures to minimize environmental impact, such as dust control and noise reduction. Properly manage waste materials and adhere to environmental regulations to promote sustainable construction practices.
By following these guidelines, the installation of geogrids on retaining walls can be executed effectively, ensuring durability and stability for years to come.